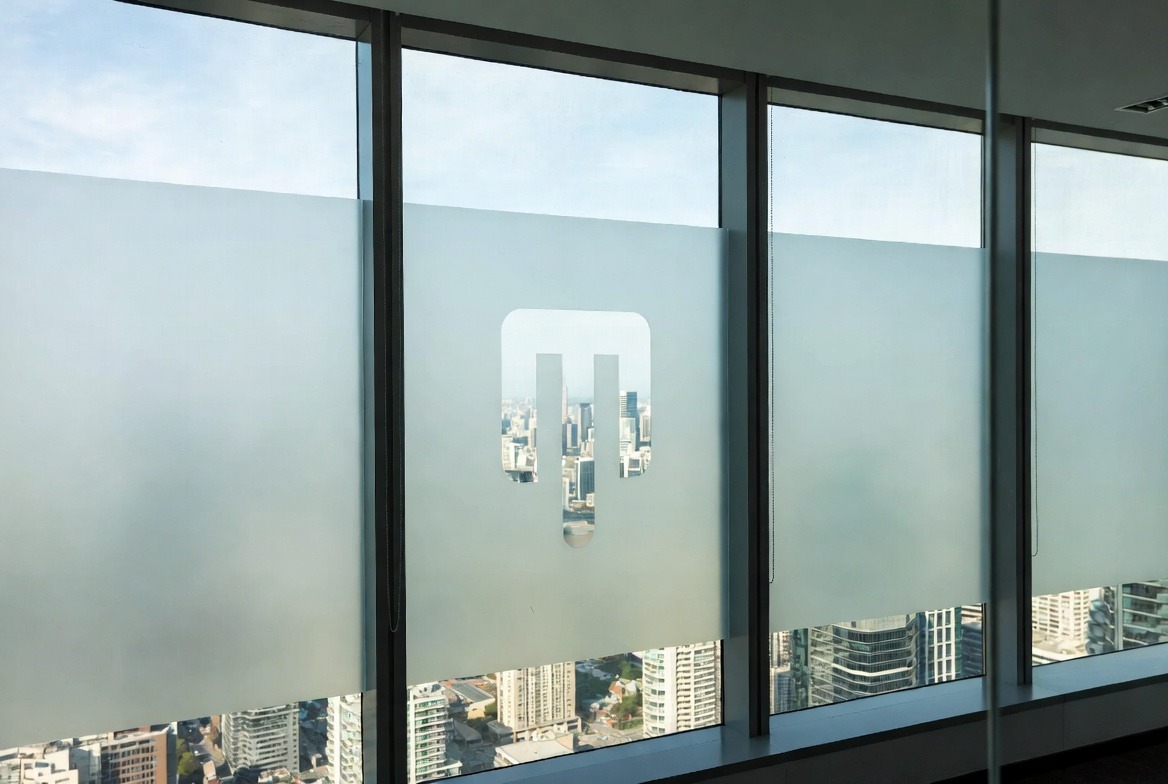
Toronto and GTA guide for vinyl window film, decorative window film, and logo film from a local window tinting service point of view.
Window films help Toronto and GTA businesses turn plain glass into branding, privacy, and better-looking storefronts. Shops, clinics, offices, salons, gyms, and cafés use window films on front doors, side panels, partitions, and street-facing glass because the glass has work to do. It needs to show the brand, block some views, guide foot traffic, and still look clean. When window films are applied the right way, the finish looks smooth, level, and professional. When the install is rushed, the problems show up fast. You see bubbles, dust, crooked letters, lifting corners, and edges that start looking rough way too soon.
That is the real problem. A lot of business owners spend money on good design, then lose the result because the install steps were skipped or rushed. The fix is not fancy. Clean the glass better. Pick the right film. Lay it out first. Apply it with control. Finish the edges. Check the job before you call it done. That basic order is what helps window films last longer and look better on busy Toronto and GTA glass.
This matters even more here because the local conditions are hard on storefronts. A downtown Toronto door gets pushed all day. A plaza unit in Scarborough gets slush and salt around the lower frame in winter. A retail window in Mississauga may take strong afternoon sun. A Markham office may want privacy film that still lets in lots of daylight. Those are not small details. They change how window films should be installed and how they perform after the job is done.
People also judge glass quickly. They do not stand on the sidewalk and study it for five minutes. They glance. If the logo sits too low, if the frosted band drifts upward, or if the corner starts peeling near the pull handle, they notice something feels off. They may not say it, but they notice it anyway. That is why the process matters so much.
Step 1: Choose the right window films for the job
Start with one clear question. What does this glass need to do?
If the goal is branding, logo film or printed vinyl film is often the best fit. If the goal is privacy, frosted or patterned window films usually work better. If the goal is a sale promo or a short-term campaign, a printed panel may make more sense than small cut lettering. If the goal is to make an office feel more private without making it dark, decorative window films are often the better pick.
This sounds simple, but a lot of bad installs begin right here. Someone picks a film because it looked nice in a sample book, not because it matched the traffic level, the glass type, or the use of the space. Door glass is not the same as a fixed side panel. Interior boardroom glass is not the same as a west-facing retail window. Thin cut lettering behaves diff than a full frosted sheet. Good choices at the start save time, waste, and call-backs later.
Example: A North York dental clinic may need privacy at the front desk but still want the space to feel bright and open. Frosted window films with a simple logo cut-out often work well there. The same setup would be a weak choice for a Queen Street West café that needs bold hours, payment icons, and promo text that people can read fast from outside.
If you want more technical product guidance before a job starts, Avery Dennison keeps a useful set of technical bulletins that explain material handling and application basics.
Step 2: Clean the glass better than you think you need to
This is the boring step, and it changes almost everything.
Glass can look clean and still be dirty enough to ruin window films. Street-level glass in Toronto and the GTA picks up hand oils, road dust, cleaner build-up, tape residue, old adhesive, salt, and little bits of grime that are hard to see until the film goes on. In spring, pollen sticks to the surface. In winter, slush hits the lower edge. In restaurants and coffee shops, grease in the air can settle on the glass too. All of that gets between the film and the surface.
Clean the full pane. Do not just wipe the centre and hope the rest will be fine. Work the edges. Check the corners. Look around handles, locks, frame lines, and weather stripping. If there was older vinyl on the glass, remove the adhesive fully. If the bottom edge near the gasket feels damp, dry it first. Film does not like hidden moisture, and it really does not like dirt trapped near the edge.
- Use lint-free cloths
- Remove old glue before the final wipe
- Dry the lower corners and frame edges well
- Check the pane from an angle, not only straight on
A common GTA problem happens after a cold week. The lower corner starts lifting and the owner thinks the film was bad. Most of the time, the real cause is simpler. Dirt stayed near the frame, the gasket area was still wet, or the edge got rushed. The film did not fail on its own. The prep failed first.
Step 3: Measure and tape the layout before peeling anything
This step saves money, and honestly, it saves embarassing front-door branding too.
Before the liner comes off, mark the layout. Find the centre. Check the height. Tape the guides. Step outside and look from the sidewalk. Then step back inside and check the sightline again. A logo that feels centred from one angle can look low from another. A privacy band that seems straight on one pane can drift across the next pane if the layout was guessed instead of measured.
People read storefront glass very quickly. They glance. If the hours sit too close to the handle, if the logo crowds the lockset, or if the frosted strip cuts across eye level in a strange way, the whole thing feels sloppy. Most people cannot explain exactly why. They just feel it.
Case example: A Markham office had three front glass panels and one glass door. The first design proof looked fine on screen, but the taped mock-up on site showed the frosted band hitting the horizontal door rail at a bad height. Moving the band a little lower made the entrance feel cleaner and much more balanced. That small change likely saved a full reprint, which nobody wanted to pay for.
Good installers do not guess the spacing. They use tape guides and check the full entrance before the film ever touches the glass. That one habit cuts down on a lot of expensive mistakes.
Step 4: Position the film with control before the adhesive grabs
This is where many do-it-yourself jobs start going sideways.
Once the film touches the glass in the wrong spot, people panic. They pull it back too fast, stretch it, collect dust, or shift the whole panel off level. That is why controlled placement matters so much. The first contact should feel steady, not frantic.
A hinge method with masking tape is one of the easiest ways to hold the panel in place while you check the position one last time. It helps keep the piece from dropping too early and gives you a cleaner start. On larger storefront panels or detailed logos, that little bit of control makes a big diff.
Decorative window films need careful alignment because level lines are easy for the eye to judge. Logo film needs even more care. Customers may not use a ruler, but they can tell when the business name leans a bit or sits too close to the edge. On glass doors and front windows, small errors show up from farther away than most people expect.
A common retail example is a small bakery or bubble tea shop getting new hours, a logo, and payment icons added before a busy weekend. If the hours land too near the pull handle, or the logo drops too low, the door starts looking cramped. Spending a few extra minutes here is much cheaper than peeling it off and starting again.
Step 5: Squeegee from the centre out with even pressure
This is the part people think about first, but it only works well if the earlier steps were done right.
Start near the centre and work outward with firm, even strokes. Overlap each pass. Keep the angle steady. Do not jump around chasing every little bubble at random. Good pressure and a clear pattern do more than speed. Fast hands usually leave haze, trapped air, or silvering behind.
For printed window films, weak squeegee work can leave lines, cloudy spots, or pockets that show later in daylight. For frosted panels, uneven pressure can make the finish look patchy. For small cut logos, too much force in the wrong place can distort fine points or lift tiny pieces.
- Use firm pressure, not jerky pressure
- Overlap each stroke
- Slow down near text and detailed cuts
- Watch the lower door area closely
The lower half of a storefront door takes abuse every day. Shoes hit it. Bags brush it. Cleaning crews wipe it hard. Slush splashes it in winter. If the squeegee pass near the bottom edge is weak, that is often where the first visible problem shows up. It may look okay on install day, then start telling the truth a few days later.
Step 6: Trim cleanly and lock down the edges
Most window films do not fail in the middle. They fail at the edge.
The corner lifts. The cut line frays. Dirt gets into a weak spot. Then the rest of the panel starts looking tired sooner than it should. That is why trimming and edge finishing matter so much, even when the main panel already looks good from a few feet away.
Use a sharp blade. Keep the cuts smooth. Do not drag a dull knife through the film and hope no one will notice. Rough cuts collect dirt faster and make the whole job look cheap. After trimming, go back and press the edges again. Check around handles, locks, lower corners, and frame lines where traffic and cleaning are hardest.
Toronto weather makes this part even less forgiving. A weak edge can stay hidden for a day or two, then show up after a warm afternoon, a freezing night, or one rushed cleaning shift. South-facing glass in Etobicoke can heat up fast. Lower frames in Scarborough plazas can stay damp longer than people think. Those patterns show up on real jobs all the time. They are not just theory.
For larger installs, safe ladder work and blade handling matter too. The Canadian Centre for Occupational Health and Safety is a good place to review basic safety practices before a bigger job starts.
Step 7: Inspect the work and explain after-care clearly
The job is not done when the backing liner goes in the bin.
Step back and check the film from inside and outside. Look at it in bright light and softer light. Check if the logo reads well from the sidewalk. Check if the privacy bands line up across every pane. Check the corners again. Then check them one more time. This last review helps catch small issues before your customers do.
After that, give simple care instructions. Do not scrub fresh window films right away. Do not tape posters over the graphic. Do not pick at the corners. Let the material settle. This sounds basic, but staff ruin fresh installs all the time because they treat the glass like bare glass on day one.
This is also the moment to be honest about the skill level needed. Some small jobs are fine for a careful in-house team. Others should go to trained pros. If the glass is large, the branding is customer-facing, or the layout needs to be exact, professional help is often cheaper than a bad redo. That is especially true for offices, clinics, salons, and retail doors where the front glass shapes the first impression.
Final thoughts for Toronto and GTA businesses
Good window films do more than cover glass. They help people find your business, read your message, feel more privacy, and judge the space in a better way. They can make a storefront feel cleaner. They can make an office look more settled. They can turn plain glass into branding that works every day without shouting.
The short version of the process looks like this:
- Pick the right film for the real job
- Clean the glass better than you think you need to
- Measure and tape the layout first
- Position the film with control
- Squeegee from the centre out
- Trim cleanly and lock down the edges
- Inspect the work and explain after-care
If you are planning new branding, privacy panels, or decorative storefront window films in Toronto and the GTA, do not rush the boring parts. The cleanest installs usually come from the least glamorous steps. Thats the part people skip, and thats the part that changes the whole result.
Leave a Reply